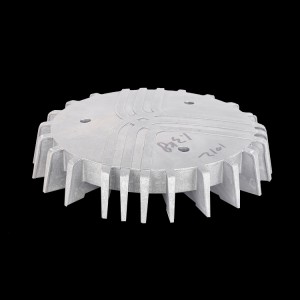
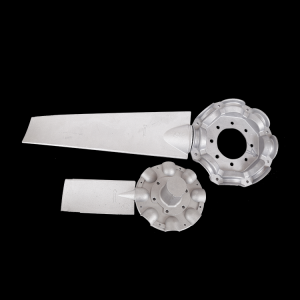
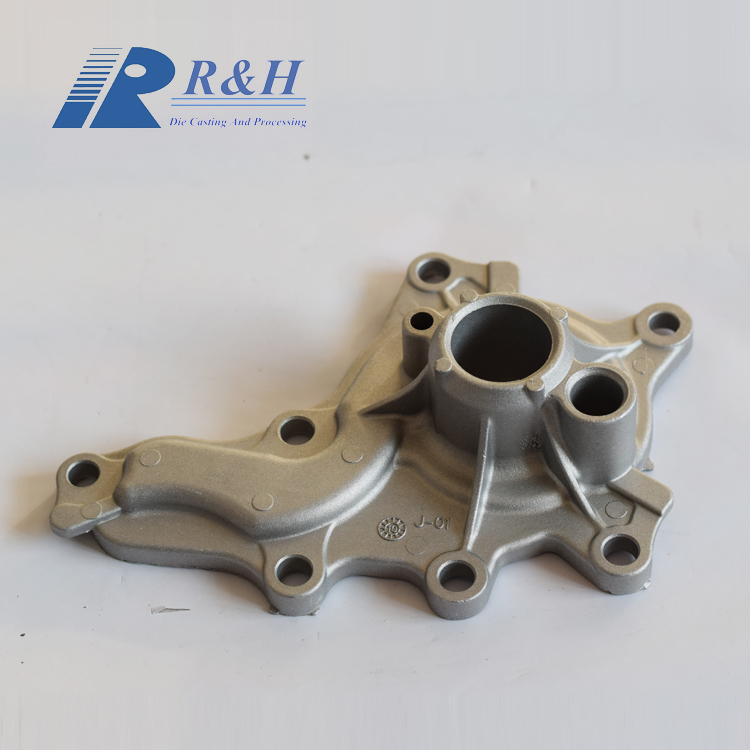
Aluminum die cast pump housing


PRODUCT SPECIFICATION
| DIAMETER | 124MM*131MM*240MM |
| THICKNESS | 4.5MM |
| SURFACE TREATMENT | Polishing |
| COLOUR | Aluminum natural color |
| MATERIAL | Aluminum |
| TECHNOLOGY | Cast Aluminum |
| APPLICATION | Car , Truck |
PRODUCT FEATURE AND ADVANTAGE
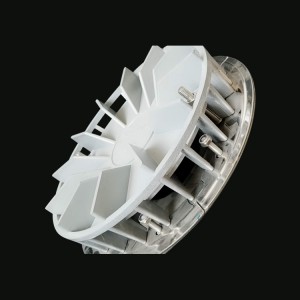
High Flow Aluminum Water Pump
INSTALLING NEW ALUMINUM DIE CAST PUMP
1.If water pump is equipped with a steel back plate covering the impeller, check all mounting bolts and tighten as required.
2.Coat both sides of new gasket with tacky sealer and position on new water pump or engine. NOTE: If using a self curing, silicone type gasket sealer from a tube, do not apply excessive amount. Excess will be squeezed out into water pump and can plug up cooling passages.
3.Install new water pump on engine block - DO NOT FORCE PUMP ON BY STRIKING END OF SHAFT.
4.Tighten mounting bolts gradually and evenly in a staggered sequence to vehicle manufacturer's torque specifications.
5.Turn pump shaft by hand to make sure it rotates freely.
6. Reinstall pulley, fan clutch (if equipped), fan, fan belts, and reconnect all hoses (Be sure the belts and pulleys are not off-set. If the pulley needs to be spaced forward, toward radiator, purchase shim kit 720-6129). Tighten fan belts to factory recommended tension. Tension can be checked with commercially available testers or by measuring fan belt deflection as specified in factory service manual.
7.Fill radiator and coolant recovery bottle with a correct mixture of fresh low silicate coolant and distilled water and check for leaks. Be sure to measure the amount of the coolant mixture that you have added to the system and compare it to your capacity specifications in your vehicle's owners manual, this will make you aware of any air that is trapped in the system.
8.Purge system of air as required.
9.Install radiator cap and run engine until normal operating temperature is reached, check for leaks and water circulation. NOTE A small, temporary seepage of coolant from the “weep hole” located on the lower side of the shaft housing may occur during initial run-in period. This should stop after the seal has been allowed to “lap in”.
10.After operating temperature has been reached, shut off engine and allow to cool - NEVER REMOVE RADIATOR CAP WHILE ENGINE IS HOT. 11. Remove radiator cap (only after engine has cooled) and top off radiator and coolant recovery bottle with additional low silicate coolant and distilled water mixture.
PACKAGING & PAYMENT TERMS & SHIPPING
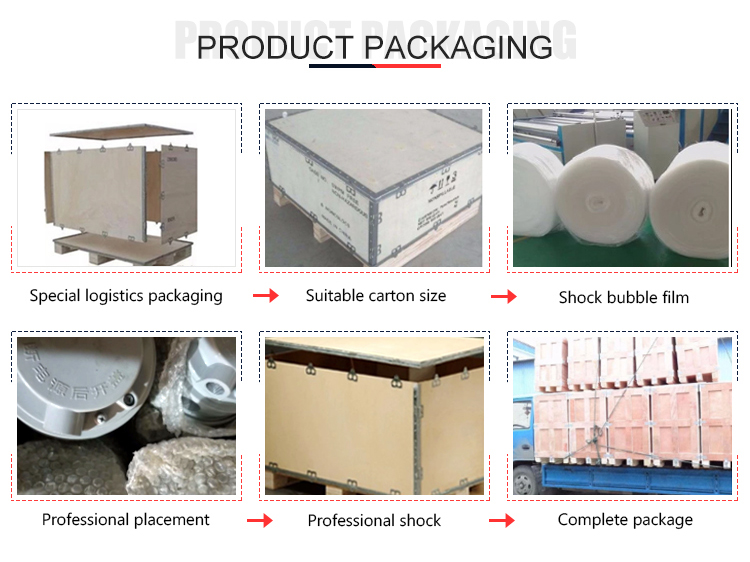
1.Packaging Detail:
a.clear bags inner packing, cartons outer packing, then pallet.
b.as per customer's demand for hardware stamping parts.
2.Payment:
T/T,30% deposits advance; 70% balance before delivery.
3.Shipping :
1.FedEx/DHL/UPS/TNT for samples, Door-to-Door;
2.By Air or by Sea for batch goods, for FCL;Airport/ Port receiving;
3.Customers specifying freight forwarders or negotiable shipping methods!
Delivery Time: 3-7 days for samples; 5-25 days for batch goods.
WHY CHOOSE US
FAQS
Q: what is the proceesing for the quote ?
A: We can quote from your 3d formats like IGS,STP,PARASOLID etc and 2D drawings as well; quote the price to clients after got the 2d or 3d drawings within 2 hours;
FACTORY SHOW